How to auto deploy Hugo website on Plesk Onyx
Guide on how to set up auto-deploying static Hugo websites using Plesk Onyx on a TransIP BladeVPS and Github with support for themes as git submodules.

Based on:
- Plesk Onyx 17.5.3
- Hugo 0.38.1
Introduction
After looking around for a static site generator from Markdown, I've chosen Hugo as my tool of choice. I would love to just be able to edit my Markdown locally on my laptop, commit, push to Github and then have my website automatically updated on the server.
Luckily this is possible when using Plesk. Plesk supports the ability to deploy a website directly from a git repository. In my case, as I'm Dutch, I've created a pre-installed TransIP BladeVPS with Plesk Onyx.
On Github I've created a private repository with a website based on the Hugo structure.
Install Hugo on TransIP BladeVPS
A TransIP BladeVPS with Plesk Onyx runs on CentOS. Although we can install hugo via the yum package manager, this is an outdated version. Luckily Hugo is written in Go and thus by default statically compiled for different platforms. You can find the latest release binaries on the official Hugo release page on Github.
For any VPS the architecture can be found out using:
$ uname -m
x86_64
Our VPS is 64-bit, so we download hugo_0.38.1_Linux-64bit.tar.gz using wget
wget https://github.com/gohugoio/hugo/releases/download/v0.38.1/hugo_0.38.1_Linux-64bit.tar.gz
Then we unpack the tarball, and move the hugo static binary to /usr/local/bin to make it available to all websites on this server:
tar zxf hugo_0.38.1_Linux-64bit.tar.gz
mv hugo /usr/local/bin
Now we can test if Hugo is available:
$ hugo version
Hugo Static Site Generator v0.38.1 linux/amd64
Great!
Auto-deploying a website
Now we can start setting up the auto-deployment part.
Setting up the link to Github
The Git package for Plesk is installed by default in the TransIP image, so we can just go to the correct webspace for our website in our Plesk interface. Then go to the Git page:

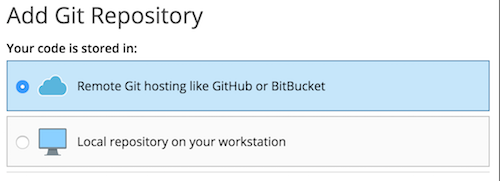
On the Git page, we select our code is stored on a remote Git hosting platform.
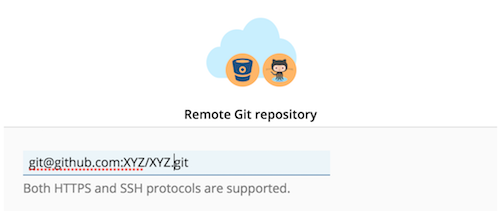
And then fill in the correct address for our (private) repository.
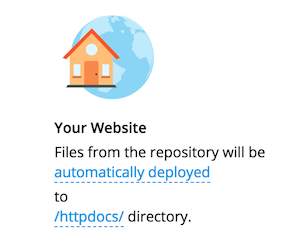
We cannot pull directly to the httpdocs directory, as we have the 'raw' Hugo data in the git repository, so we change the destination of our automatic deployment, by clicking on the blue /httpdocs/ link.
Then we select the Root directory and click the Create Folder button. For name I chose origin, but you can choose anything you like. Just make sure it becomes a subdirectory of the Root directory.
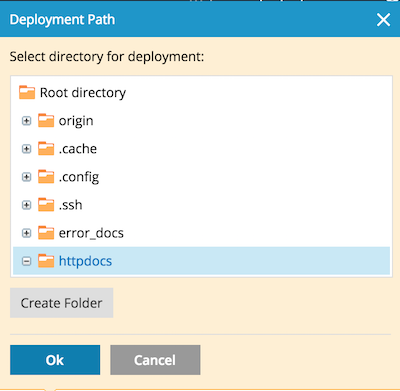
Now we click the origin directory to select it as our destination, which will be reflected on the original page.
To make sure that Plesk can pull from the Github repository, we need to copy and paste the public key at the bottom of the Plesk Git page to our Deploy Keys on the Settings page in our Github repository. As we only want to pull from the Github repo to our VPS, the deploy key does not need to get Write access.
Note: If you are using themes as git submodules and one (or more) of those themes are private, you cannot use Deploy Keys on Github. Deploy Keys can only be linked to one repository. You will have to create a Github machine user instead with the Deploy Key as one of its SSH keys and then add the machine user as a collaborator on all your private repositories.
We can now press 'OK' and if all goes well, you will be met with a nice green popup telling you the first pull went well!
Setting up the webhook between Plesk and Github
We want our website to automatically re-deploy when the website source in our Github repo gets updated. To do that, we click on 'Repository Settings' for our repository in the Plesk Git Repositories page.

Then we copy the Webhook URL, and paste it as a new Webhook on the Settings page of our Github repository.
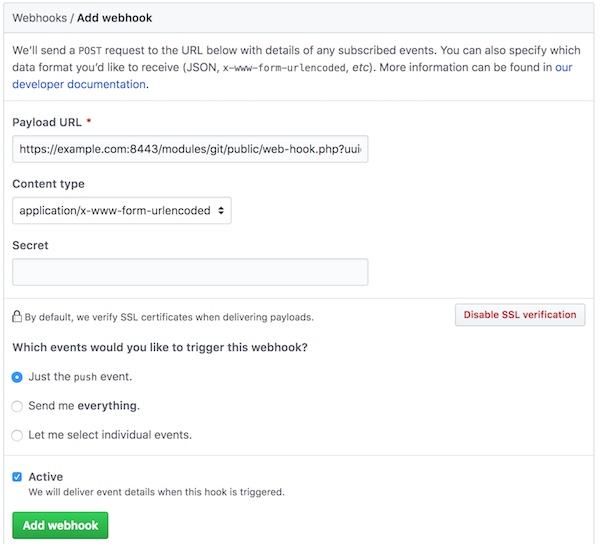
If you have not yet set up your SSL certificate for your host correctly, you might want to temporarily (!) disable SSL verification.
Now in the Plesk interface, we 'Enable additional deploy actions' for our git repository.

In the textbox we put the commands:
/usr/local/bin/hugo --cacheDir ~/hugo_cache
rm -r ~/httpdocs/*
cp -r ~/origin/public/* ~/httpdocs/
Using a Hugo theme as a submodule in Plesk
Important to note: Plesk auto-deploy using git does not support git submodules by default.
If you want to use your hugo theme as a git submodule in Plesk (and why wouldn't you want to do that?), you have to add another line in the deploy actions!
The first line in the deploy actions textbox should be:
git --git-dir=${HOME}/git/<name of your repo>.git/ --work-tree=. submodule update --init --recursive
Where you have to explicitly use the name of the root git repository you just set up in Plesk. If you do that, git submodules work as expected with hugo and Plesk!
Make it so!
We can now press 'Apply' and now every time you push new content to your website source repo, Plesk will pull the update, and the build the website.