Provisioning Consul, Nomad and Gluster with SaltStack
Part 3 of Avoiding the Cloud series: An extensive walkthrough on creating the correct Salt State files to provision Consul, Nomad and Gluster using Saltstack

Paul

This is Part 3 of the Avoiding the Cloud series. This step is not dependent on TransIP and can thus be used in any situation where you have four Ubuntu 20.04 images with Salt Minion installed.
In Part 2: Reproducibly provisioning Salt Minions on TransIP, we provisioned 4 different VPSs with just a Salt Minion and the hostnames and IP address that we defined in Part 1: Building a Docker cluster with Nomad, Consul and SaltStack on TransIP.
In this part of the series we will use SaltStack to further configure our nodes and make them fulfill their designated roles. There are only a very few steps that need to be performed manually. But with SaltStack even those you can run without leaving your Salt Master's host.
Whenever I talk about putting specific contents in a file, I'll leave it up to you to pick your preferred way. Personally I use vi, but nano is present as well.
Recap
We are building a Docker Cluster with Nomad, Consul and Gluster. We have a private IP layout defined and we have set roles for each of our four node types.
For configuration management we use SaltStack. SaltStack works declarative. You define a wanted 'state' on you minions, and ask the Salt Master to apply the state to the relevant Salt Minions.
In this part we'll go through all the little steps to fully setup a single lane of the cluster. This means we only install a single Consul Server, a single Nomad Server, a single Docker host and a single Gluster storage server. In a following Part we'll go through the instructions on adding additional redundancy to each of the different node types.
We are using a default Salt Master install on Ubuntu 20.04. We are not using the package from the Ubuntu repositories, but the one provided by the SaltStack team itself as it's a newer version.
SaltStack primer
If you have no experience with SaltStack, don't worry. I didn't have either before setting this up. You'll easily get up to speed when walking through all the steps below. For now the most important thing to know is that all necessary configuration information is located in /srv, which by default is only writable by root. In /srv/salt all the Salt States are located. A Salt State is a defined end-state that is demanded from a minion. In /srv/pillar all the Pillar data is located. Pillar data is often the configuration data for some Salt States. We'll see this come into play when setting up the firewall rules.
Both the Salt States and Pillars are in a two-tiered structure. There is a top.sls file for each that defines which states or pillars are relevant to which nodes. Node selection can be based on node id, or other known information and can include regex matches.
Our final directory tree for our cluster will look like this:
$ tree /srv
/srv
├── pillar
│   ├── top.sls
│   ├── ufw_docker.sls
│   ├── ufw_private_only.sls
│   └── unbound_consul_dns.sls
└── salt
    ├── config.jinja
    ├── consul_client.sls
    ├── consul_node.sls
    ├── consul_server.sls
    ├── data
    │   ├── consul.d
    │   │   ├── client.hcl
    │   │   └── server.hcl
    │   ├── docker_ufw.patch
    │   ├── nomad.d
    │   │   ├── client.hcl
    │   │   ├── nomad.hcl
    │   │   └── server.hcl
    │   ├── plans
    │   │   ├── traefik.nomad
    │   │   └── whoami.nomad
    │   └── resolv.conf
    ├── docker_fw.sls
    ├── disable_resolved.sls
    ├── gluster_client.sls
    ├── gluster_hosts.sls
    ├── gluster_repository.sls
    ├── gluster_server.sls
    ├── hashicorp_repository.sls
    ├── nomad_client.sls
    ├── nomad_server.sls
    ├── resolv.conf
    ├── storage_volume.sls
    └── top.sls
That's a lot of files, and we'll go through them step-by-step in a logical order. Let's start by setting us up to easily allow editing of the Stack and Pillar files.
$ sudo mkdir -p /srv/salt /srv/pillar
$ sudo addgroup salt
$ sudo addgroup boss salt
$ sudo chgrp -R salt /srv
$ sudo chmod 775 /srv/salt /srv/pillar
Now log out of this session and start a new SSH session to this host so we are in the salt group and we can edit in /srv without any hassle. We're finally ready to start our SaltStack journey. To check that our four minions are up and running, let's query them:
$ sudo salt '*' test.version
nomad-server-01:
    3002.5
gluster-01:
    3002.5
docker-01:
    3002.5
consul-server-01:
    3002.5
All four servers responded. Great. Now we can start setting up the required States and Pillars step-by-step.
Allow private network traffic
In general we trust our private network. Even more so, Docker will open up container ports on all kind of weird port numbers, so it's hard to police the internal connections. So let's start by opening up the generic firewall that we'll use as a basis on all node So let's start by opening up the generic firewall that we'll use as a basis on all nodes.
Our nodes all use UFW (the Uncomplicated Firewall) as the firewall deamon. To allow Salt to modify the configuration of UFW, we need a specific Salt Formula. A Salt Formula is kind of a module that tells Salt about a new State. Salt Modules use gitfs and are refreshed every 30 seconds. It's thus important to use a repository you trust or to make a clone yourself and use that.
I've made a required improvements to the Salt UFW formula so I advise you to either use or clone my version of the salt-formula. To use mine add the following to /etc/salt/master:
fileserver_backend:
  - git
  - roots

gitfs_remotes:
  - https://github.com/pjbakker/ufw-formula
The first part tells Salt Master to use Gitfs as a file server backend before looking on disk. The second part tells it to look in the git repositories provided for possible formulas.
In order for Salt to be able to use Salt Modules via Github, you'll first need to add the python-pygit2 package to the Salt Master and restart it:
$ sudo apt-get install python3-pygit2
$ sudo service salt-master restart
Now the Salt Master will keep watch of the ufw-formula and apply it when asked. We can tell it to, by adding ufw as a requested state module for all our nodes. To enable the UFW state on all nodes, create /srv/salt/top.sls with the following content:
base:
  '*':
    - ufw
This tells Salt that all nodes ('*') should have the ufw state.
To configure what the UFW state means for each node, you'll need to create pillar data to use. Pillars are private configuration data that are detailed per node.
First create /srv/pillar/top.sls with:
base:
  '*':
    - ufw_private_only
This instructs all nodes to have pillar data from the /srv/pillar/ufw_private_only.sls file. So let's create it:
ufw:
  enabled: True
  interfaces:
{% if 'ens7' in grains['ip_interfaces'] %}
    ens7:
      comment: Private network ens7
{% endif %}
{% if 'ens8' in grains['ip_interfaces'] %}
    ens8:
      comment: Private network ens8
{% endif %}
This pillar data is meant for the Salt State that the ufw-module provides and tells it to enable traffic on ens7 and ens8 if it is present in the grains of the node. Salt's grains are pieces of useful information on the node. In this case the list of ip_interfaces that are present on the node.
Pillar data is only available on nodes after it is refreshed, so let's do that now:
$ sudo salt '*' saltutil.refresh_pillar
You can check that a single node has the right pillar information by requesting the nodes pillar items, like this:
$ sudo salt 'consul-*' pillar.items ufw
consul-server-01:
    ----------
    ufw:
        ----------
        enabled:
            True
        interfaces:
            ----------
            ens8:
                ----------
                comment:
                    Private network ens8
Ok.. The nodes knows about this generic UFW pillar data. Now let's apply the state:
$ sudo salt '*' state.apply
At this point you can ask all the nodes to show the firewall rules present. We could of course SSH into the nodes, but we can also use Salt to run a remote command.:
$ sudo salt 'consul-server-01' cmd.run 'ufw status'
consul-server-01:
Status: active

To                         Action      From
--                         ------      ----
Anywhere on ens8           ALLOW       Anywhere                   # Private network ens8
Anywhere (v6) on ens8      ALLOW       Anywhere (v6)              # Private network ens8
Great.. So you've added a firewall configuration to your servers and checked it without leaving your host.
Setting up the Consul Server
To set up Consul you'll first have to install Consul onto your Consul server consul-server-01, and set it up correctly. As with Salt, there is a version of Consul available in the standard Ubuntu repositories, but it's quite outdated. So we also tell your server to install the right Hashicorp repository.
Let's first create /srv/salt/hashicorp_repository.sls with the following content:
hashicorp repository:
  pkgrepo.managed:
    - humanname: Hashicorp
    - name: deb [arch=amd64] https://apt.releases.hashicorp.com focal main
    - dist: focal
    - file: /etc/apt/sources.list.d/hashicorp.list
    - gpgcheck: 1
    - key_url: https://apt.releases.hashicorp.com/gpg
In this Salt State we tell the system to make sure there is a package repository that refers to https://apt.releases.hashicorp.com for the focal distribution and used the appropriate Hashicorp GPG key to verify the repository and its packages.
The reason we put this in a separate file / Salt State is that it will be needed for Nomad as well. By putting it in a separate file we can easily include it in both other states.
Now create a generic Consul node salt state in /srv/salt/consul_node.sls and just instruct our node to include the state we defined in hashicorp_repository.sls and the make sure that a package named consul is installed:
include:
  - hashicorp_repository

consul installed:
  pkg.installed:
    - name: consul
    - require:
      - pkgrepo: hashicorp repository
We'll need to do a bit more to make it a real Salt server, but for now we need one installed Consul application to generate an encryption key for us. So let's first tell Salt to apply the consul node state only to all Consul servers by modifying /srv/salt/top.sls to match only nodes whose id starts with consul-server-, like this:
base:
  '*':
    - ufw
  'consul-server-*':
    - match: pcre
    - consul_node
Now apply our defined Salt states to all nodes.
$ sudo salt '*' state.apply
This does not modify any of the other nodes, because we didn't change anything for them in the top.sls. After this command returns, Consul should be installed on our consul-server-01, so we can now use a remote command to generate a Consul encryption key.
$ sudo salt 'consul-server-01' cmd.run 'consul keygen'
consul-server-01:
    SOME_GENERATED_CRYPTO_KEY
As we'll need some standard cluster info in this state and a lot of different other Salt state files, it's easier to have them in a single central location. So let's start by creating /srv/salt/config.jinja:
{% set cluster = ({
    "subnet": "192.168.0.0/24",
    "ip_start": "192.168.0.",
    "consul_server_ips": ["192.168.1.10"],
}) %}
This cluster configuration defines the subnet we'll use, the string each IP address starts with and our Consul server IPs (just one at this moment).
We start by defining a config file in /srv/salt/data/consul.d/server.hcl that we want to have installed on all Consul servers. We include the encryption key generated in the previous command in the encrypt variable.
{% from "config.jinja" import cluster with context %}
{% set private_ip = salt["network.ip_addrs"](cidr = cluster.subnet)[0] %}

data_dir = "/opt/consul/"
log_level = "INFO"
enable_syslog = true

datacenter = "dc1"

server = true
bootstrap_expect = 1

bind_addr = "0.0.0.0"
advertise_addr = "{{ private_ip }}"

encrypt = "SOME_GENERATED_CRYPTO_KEY"
retry_join = [ "{{ cluster.consul_server_ips[0] }}" ]
Now again we use the power of Salt and the node's grain to fill the configuration file with node specific information. We use Salt to inspect the node's grains where this config is put, and retrieve the private IP address associated with the node that falls within our configured cluster subnet (192.168.0.0/24). If we would not limit the cidr it would return the first interface's IP address which is the public IP address. Jinja stores the IP address in private_ip, which we use as the bind_addr for this node's Consul server.
Now we can update /srv/salt/consul_node.sls by adding one more states after the first one, like this:
include:
  - hashicorp_repository

consul installed:
  pkg.installed:
    - name: consul
    - require:
      - pkgrepo: hashicorp repository

consul running:
  service.running:
    - name: consul
    - enable: True
    - require:
      - pkg: consul
Our added state makes sure that the consul service is really running. And now we create our first specialization of the consul node, but creating /srv/salt/consul_server.hcl:
include:
  - consul_node

/etc/consul.d/consul.hcl:
  file.managed:
    - source: salt://data/consul.d/server.hcl
    - user: consul
    - group: consul
    - mode: 644
    - template: jinja
    - require_in:
      - service: consul running
    - watch_in:
      - server: consul running
We include all state in /srv/salt/consul_node.sls at the start and then we make sure that our local file on the Salt Master (/srv/salt/data/consul.d/server.hcl) is run through the Jinja template engine and then installed as /etc/consul.d/consul.hcl on the system, owned by consul.
And we change our /srv/salt/top.sls to use the consul_server state instead of the consul_node state:
base:
  '*':
    - ufw
  'consul-server-*':
    - match: pcre
    - consul_server
Now we again apply our defined Salt states to all nodes.
At this point we have a running Consul server on our node consul-server-01.
$ sudo salt '*' state.apply
Adding the Consul Clients
Configuring the Consul clients is very similar to the Consul server, especially now we already have it up and running with an encryption key. Let's start with the /srv/salt/data/consul.d/client.hcl configuration file and fill it with:
{% from "config.jinja" import cluster with context %}
{% set private_ip = salt["network.ip_addrs"](cidr = cluster.subnet)[0] %}

data_dir = "/opt/consul/"
log_level = "INFO"
enable_syslog = true

datacenter = "dc1"

server = false

bind_addr = "0.0.0.0"
advertise_addr = "{{ private_ip }}"

encrypt = "SOME_GENERATED_CRYPTO_KEY"
retry_join = [ "{{ cluster.consul_server_ips | join('", "') }}" ]
Almost identically to the server version, we bind it to the node's private IP address and use the previously generated encryption key. The big difference is that we set server to false and include a retry_join array with all the Consul server IPs (only one at this moment).
Then we setup a state specifically for Consul clients in /srv/salt/consul_client.sls:
include:
  - consul_node

/etc/consul.d/consul.hcl:
  file.managed:
    - source: salt://data/consul.d/client.hcl
    - template: jinja
    - user: consul
    - group: consul
    - mode: 644
    - require_in:
      - service: consul running
    - watch_in:
      - server: consul running
This state file should look very familiar. Again we build upon /srv/salt/consul_node.sls and make sure our local config (/srv/salt/data/consul.d/client.hcl in this case) is installed and watched by the Consul service.
Let's update our /srv/salt/top.sls to include this state for all other node types:
base:
  '*':
    - ufw
  'consul-server-*':
    - match: pcre
    - consul_server
  'nomad-server-*':
    - match: pcre
    - consul_client
  'docker-*':
    - match: pcre
    - consul_client
  'gluster-*':
    - match: pcre
    - consul_client
Now we are ready to apply this state and make our nomad server node and docker node Consul clients:
$ sudo salt '*' state.apply
Let's check by asking the Consul server about its members. You should seem something like this:
$ sudo salt 'consul-server-01' cmd.run 'consul members'
consul-server-01:
    Node               Address             Status  Type    Build  Protocol  DC   Segment
    consul-server-01   192.168.0.10:8301   alive   server  1.9.4  2         dc1  <all>
    docker-01          192.168.0.30:8301   alive   client  1.9.4  2         dc1  <default>
    nomad-server-01    192.168.0.20:8301   alive   client  1.9.4  2         dc1  <default>
    gluster-01         192.168.0.100:8301  alive   client  1.9.4  2         dc1  <default>
Great! You now have a working Consul setup.
Setting up Consul Service Discovery
One of the great things about Consul is its dynamic DNS service where you can request an IP for a service or node you are looking for withing your cluster. For instance, by resolving docker-01.node.consul at any of the cluster's nodes you get the IP address 192.168.0.30. And the same for your Docker services that will be running on top of it.
But at the moment all nodes still resolve their queries through the regular channels and the .consul top-level domain is not recognized. We'll fix that by stopping to use the default system-resolved and moving to the Unbound DNS resolver. Just like for UFW, there is a Salt formula for Unbound. Let's include it by adapting the gitfs_remotes array in /etc/salt/master and adding the second formula there:
gitfs_remotes:
  - https://github.com/pjbakker/ufw-formula
  - https://github.com/pjbakker/salt-unbound-formula
Here again, I made a fix to the salt-unbound-formula to make it work for Consul (support for do_not_query_localhost was missing. So either use mine or fork mine and use that one, until the change is accepted upstream.
Now restart our Salt master:
$ sudo service salt-master restart
Just like the UFW formula, the Unbound formula takes it configuration from Pillar. So we'll create a Pillar file at /srv/pillar/unbound_consul_dns.sls with:
unbound:
  server:
    do_not_query_localhost: false
    domains_insecure:
      - consul
  stubzones:
    consul:
      stub-addr: 127.0.0.1@8600
This will instruct Unbound to use the DNS server at port 8600 for the .consul top-level domain. But you'll still have to tell Salt that it's part of the generic Pillar stack, so let's update /srv/pillar/top.sls to add it:
base:
  '*':
    - ufw_private_only
    - unbound_consul_dns
We'll have to replace resolv.conf as well on the affected nodes, so let's create one locally at /srv/salt/data/resolv.conf:
nameserver ::1
nameserver 127.0.0.1
options trust-ad
This tells a node to use the local DNS resolver (Unbound in this case) instead of external servers.
Now let's make a Sals state for disabling systemd-resolved in /srv/salt/disable_resolved.sls:
{% from "config.jinja" import cluster with context %}
{% set private_ip = salt["network.ip_addrs"](cidr = cluster.subnet)[0] %}
{% set host_id = grains['id'] %}

disable systemd-resolved:
  service.dead:
    - name: systemd-resolved
    - enable: false

/etc/resolv.conf:
  file.managed:
    - source: salt://resolv.conf
    - user: root
    - group: root
    - mode: 644
    - follow_symlinks: False

add host to /etc/hosts:
  host.present:
    - ip: {{ private_ip }}
    - clean: True
    - names:
      - {{ host_id }}
In the first state we use the service.dead state to makes sure the systemd-resolved service is disabled on the system. The second state makes sure /etc/resolv.conf on the node matches our locally defined file that we just made. And the third state makes sure that the node's hostname resolves to its private IP address. (This is implicitly done by systemd-resolved and now needs to be explicitly present).
Now we have all required files in place. To replace systemd-resolved we need to apply 4 specific states in the right order:
First we need to install Unbound while
aptcan still resolve the Ubuntu package repositories.Then we need to prepare the Unbound configuration.
Only then can we stop and disable
systemd-resolvedAnd finally enable the Unbound service to handle our DNS resolving.
So let's adapt /srv/salt/top.sls to have the generic ('*') states like this:
base:
  '*':
    - ufw
    - unbound.install
    - unbound.config
    - disable_resolved
    - unbound.service
<skipped the other selectors>
Let's apply our new pillar items and new state definitions to all nodes and check that we can now resolve nodes using Consul's DNS service
$ sudo salt '*' saltutil.refresh_pillar
$ sudo salt '*' state.apply
$ sudo salt 'docker-01' cmd.run 'host nomad-server-01.node.consul'
docker-01:
    nomad-server-01.node.consul has address 192.168.0.20
Congratulations. You now have Consul Service Discovery running on your nodes.
Installing the first Nomad Server
Now we are ready to install our Nomad server. As you might expect, this will be very similar to the install progress for the Consul application. Start by creating /srv/salt/data/nomad.d/nomad.hcl:
datacenter = "dc1"
data_dir = "/opt/nomad/data"
And /srv/salt/data/nomad.d/server.hcl:
server {
  enabled = true
  bootstrap_expect = 1
}
With bootstrap_expect = 1 we tell the Nomad server that it's alone in the universe and should not expect to pair with another Nomad server to pair with. With that in place, we can create our generic Nomad node state in /srv/salt/nomad_node.sls:
include:
  - hashicorp_repository

nomad installed:
  pkg.installed:
    - name: nomad
    - require:
      - pkgrepo: hashicorp repository

/etc/nomad.d/nomad.hcl:
  file.managed:
    - source: salt://nomad.d/nomad.hcl
    - user: root
    - group: root
    - mode: 644

nomad running:
  service.running:
    - name: nomad
    - enable: True
    - watch:
      - file: /etc/nomad.d/nomad.hcl
Similar to the Consul states, we start by including the Hashicorp package repository and installing Nomad's package. Then we make sure the node's state includes our nomad.hcl. And finally the state should include a running Nomad service.
Now we specify our Nomad server specific state in /srv/salt/nomad_server.sls:
include:
  - nomad_node

/etc/nomad.d/server.hcl:
  file.managed:
    - source: salt://data/nomad.d/server.hcl
    - user: root
    - group: root
    - mode: 644
    - watch_in:
      - service: nomad running
Our Nomad server state just installs our server configuration file and makes sure it's watched by Nomad. Of course you'll have to include this state in /srv/salt/top.sls to be recognized by Salt, so adapt the nomad-server-* selector to include this new Salt State, like this:
<skipped everything in front>
  'nomad-server-*':
    - match: pcre
    - consul_client
    - nomad_server
<skipped everything after>
Now apply the new state and check that Nomad server is running:
$ sudo salt '*' state.apply
$ sudo salt 'nomad-server-01' cmd.run 'nomad status'
nomad-server-01:
    No running jobs
We got a response (even though the list is empty), so our Nomad server is up and running.
Installing the Docker host / Nomad client
Our Docker host node type should include Docker for running the requested containers and a Nomad Client to receive jobs from the Nomad server cluster (of 1).
Similar to the Nomad server, you'll start by defining the template for the Nomad client configuration file in /srv/salt/nomad.d/client.hcl:
{% from "config.jinja" import cluster with context %}
{% set private_ip = salt["network.ip_addrs"](cidr = cluster.subnet)[0] %}
{% set private_ens = salt["network.ifacestartswith"](cluster.ip_start)[0] %}

bind_addr = "{{ private_ip }}"

client {
  enabled = true
  network_interface = "{{ private_ens }}"
}
We bind the Nomad client to our private IP address and instruct Nomad to advertise the Docker services that it will run on the node's private interface.
Of course we need to add a new Nomad client Salt state in /srv/salt/nomad_client.sls:
include:
  - nomad_node

docker installed:
  pkg.installed:
    - name: docker.io

/etc/nomad.d/client.hcl:
  file.managed:
    - source: salt://nomad.d/client.hcl
    - template: jinja
    - user: root
    - group: root
    - mode: 644
    - watch_in:
      - service: nomad running
Again, a specialization of our Nomad node state. Similar to the Nomad Server state, we make sure that both the docker.io package is installed. Then we check that our client-specific configuration file client.hcl is present and watched by the nomad service.
And of course we need to add this state to our top Salt stack file in /srv/salt/top.sls:
<skipped everything in front>
  'docker-*':
    - match: pcre
    - consul_client
    - nomad_client
<skipped everything after>
Let's apply the new state and check that Nomad server has a real node in it now:
$ sudo salt '*' state.apply
$ sleep 10 && sudo salt 'nomad-server-01' cmd.run 'nomad node status'
nomad-server-01:
    ID        DC   Name       Class   Drain  Eligibility  Status
    71a3cf11  dc1  docker-01  <none>  false  eligible     ready
W00t! You now have a working Nomad cluster with Consul Service Discovery. Ok.. Ok.. The cluster size is very small and not redundant yet. But it's a great start.
So what's next? We didn't yet install the Gluster node.
Setting up our Gluster node
Gluster, like Nomad, Salt and Consul, is present in the Ubuntu repositories, but not up-to-date. So we'll start by creating a state just for adding the Gluster repository to our node. That way we can use it in both the server and the client states. So let's start with /srv/salt/gluster_repository.sls:
glusterfs repository:
  pkgrepo.managed:
    - humanname: GlusterFS PPA
    - name: deb http://ppa.launchpad.net/gluster/glusterfs-7/ubuntu focal main
    - dist: focal
    - file: /etc/apt/sources.list.d/glusterfs.list
    - keyserver: keyserver.ubuntu.com
    - keyid: 13E01B7B3FE869A9
This will make sure that the Gluster PPA is present on our node and the public key with id 13E01B7B3FE869A9 present to verify everything.
To install the Gluster Daemon itself on our node, you'll start by creating the correct state for the Gluster node in /srv/salt/gluster_server.sls:
include:
  - gluster_repository

glusterfs-server installed:
  pkg.installed:
    - name: glusterfs-server
    - require:
      - pkgrepo: glusterfs repository

glusterd running:
  service.running:
    - name: glusterd
    - enable: True
    - require:
      - pkg: glusterfs-server
This state starts by requiring that the glusterfs-server package is present on the node and that glusterd is running. And to mount our disk at the proper location you should create /srv/salt/storage_volume.sls:
storage brick1 mounted:
  mount.mounted:
    - name: /data/gluster/storage/brick1
    - device: /dev/vda2
    - fstype: xfs
    - mkmnt: True

storage volume present:
  glusterfs.volume_present:
    - name: storage
    - bricks:
        - gluster-01:/data/gluster/storage/brick1/brick
    - start: True
This state needs to have /dev/vda2 mounted on /data/gluster/storage/brick1. And finally it requires a volume to be present with a single Gluster brick located at /data/gluster/storage/brick1/brick and named storage. (You should of course use the volume name you selected during your Salt minion provisioning).
You'll have to add these states to /srv/salt/top.sls:
<skipped everything in front>
  'gluster-*':
    - match: pcre
    - consul_client
    - gluster_server
    - storage_volume
<skipped everything after>
We can now apply our new state requests, and verify our volume is online:
$ sudo salt '*' state.apply
$ sudo salt 'gluster-01' cmd.run "gluster volume status"
gluster-01:
    Status of volume: storage
    Gluster process                                          TCP Port  RDMA Port  Online  Pid
    ------------------------------------------------------------------------------
    Brick gluster-01:/data/gluster/storage/brick1/brick      49152     0          Y       15364

    Task Status of Volume storage
    ------------------------------------------------------------------------------
    There are no active volume tasks
And now we have a working Gluster node as well. That means all different parts are operational, but the Load Balancer cannot yet reach the cluster of make sure it's alive.
Opening up the docker host firewall
The provider's load balancer only needs to reach our docker hosts. None of the others need to be available from the outside. Your docker host is still using the default private configuration we made at the start though. But the docker host is of course a bit special. It actually requires two additional things. We need to allow your Load Balancer to reach local ports, and Docker needs to be able to communicate with services on other interfaces, thus forwarding should be allowed.
To make this work, we'll make a new Salt Pillar for the docker host's UFW data in /srv/pillar/ufw_docker.sls:
ufw:
  enabled: True
  settings:
    default_forward_policy: 'ACCEPT'
  sysctl:
    forwarding: 1
  interfaces:
{% if 'ens7' in grains['ip_interfaces'] %}
    ens7:
      comment: Private network ens7
{% endif %}
{% if 'ens8' in grains['ip_interfaces'] %}
    ens8:
      comment: Private network ens8
{% endif %}
    docker0:
      comment: Private network docker0
  services:
    8080:
      protocol: tcp
      from_addr:
        - 136.144.151.253
        - 136.144.151.254
        - 136.144.151.255
        - 89.41.168.61
        - 89.41.168.62
        - 89.41.168.63
        - <YOUR_IP>
      comment: HAIP and private IP
As you can see we also open up port 8080. The IP addresses you put here are the IP addresses of your provider's Load Balancer (for instance the TransIP HA-IP addresses that you get assigned), and perhaps your personal IP address to test the connection if the provider's Load Balancer is not yet working.
In Part 4 we'll add the service behind port 8080, which will be the cluster's load distributor Traefik.
Of course we'll need to adapt /srv/pillar/top.sls to be aware of this new Pillar data:
base:
  '*':
    - ufw_private_only
    - unbound_consul_dns
  'docker-*':
    - ufw_docker
But that's not all. By default our Ubuntu hosts will not forward and masquerade traffic from the docker0 interface to our private network interface. Which means that services on different nodes cannot reach each other. We fix this by applying a patch to /etc/ufw/before.rules. Let's put the patch (based on a StackOverflow answer from Franchu) in /srv/salt/data/docker_ufw.patch:
--- before.rules.orig
+++ before.rules
@@ -16,6 +16,11 @@
 :ufw-not-local - [0:0]
 # End required lines

+# docker rules to enable external network access from the container
+# forward traffic accross the bridge
+-A ufw-before-forward -i docker0 -j ACCEPT
+-A ufw-before-forward -i testbr0 -j ACCEPT
+-A ufw-before-forward -m state --state RELATED,ESTABLISHED -j ACCEPT

 # allow all on loopback
 -A ufw-before-input -i lo -j ACCEPT
@@ -73,3 +78,9 @@

 # don't delete the 'COMMIT' line or these rules won't be processed
 COMMIT
+
+*nat
+:POSTROUTING ACCEPT [0:0]
+-A POSTROUTING -s 172.16.0.0/12 -o {{ private_ens }} -j MASQUERADE
+# don't delete the 'COMMIT' line or these rules won't be processed
+COMMIT
And let's put the relevant new state in /srv/salt/docker_fw.sls:
{% from "config.jinja" import cluster with context %}
{% set private_ens = salt["network.ifacestartswith"](cluster.ip_start)[0] %}

patch ufw before.rules:
  file.patch:
    - name: /etc/ufw/before.rules
    - source: salt://data/docker_ufw.patch
    - template: jinja
    - defaults:
        private_ens: {{ private_ens }}
Of course you'll need to add the new state to /srv/salt/top.sls:
<skipped everything before>
  'docker-*':
    - match: pcre
    - nomad_client
    - consul_client
    - docker_fw
<skipped everything after>
We can now refresh the pillar data, and apply our new state requests:
$ sudo salt '*' saltutil.refresh_pillar
$ sudo salt '*' state.apply
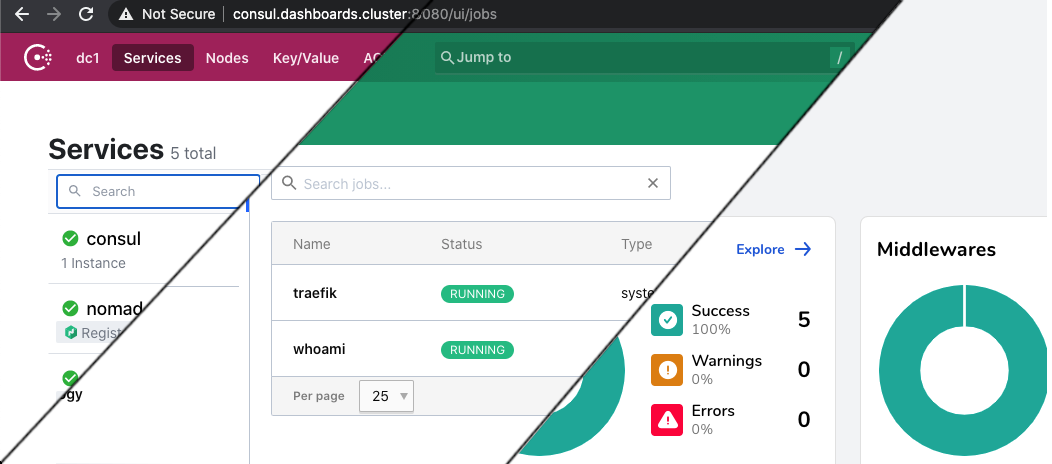
Now everything is ready for operational use. There is not yet a Health Check available for your provider's load balancer to check and there is not yet cluster-level traffic distribution in place. In Part 4 we'll add the whoami service and dashboards behind port 8080, which will be serviced by the cluster's load distributor Traefik.