How to use Tomb to Store Secrets
Burying the truth: Step by step instructions for using and understanding the Tomb script from dyne.org on Ubuntu to covertly and securely store secret data in an encrypted tomb.

Paul

Based on:
Ubuntu 16.04 LTS
Tomb 2.8.1
Requirements:
3x USB stick (1 marked with 'OS', 1 marked with 'Tomb', 1 marked with 'Key')
Introduction
Sometimes there is the need to store some data offline in a secure fashion. Ideally in a way that can be recreated later on and based on a standard that is probably going to stay around for a long while.
Tomb from dyne.org is an open source, free tool for file encryption using Linux.
Create main Ubuntu OS USB drive
Creating Ubuntu USB drive
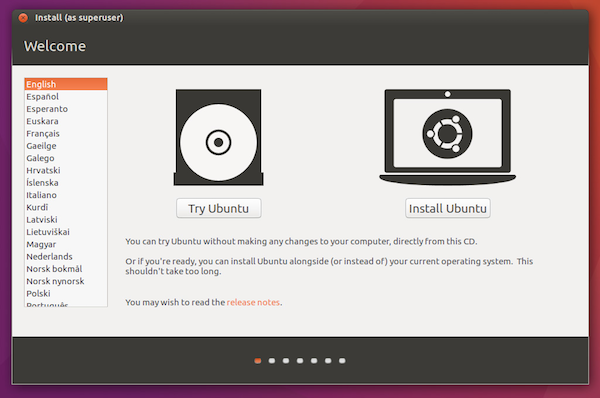
First you'll need to Burn an Ubuntu 16.04 image to a USB stick according to Ubuntu's instructions.
When you boot from the new Ubuntu drive, select 'Try Ubuntu' so you can be sure that no files will be stored on a disk somewhere.
Installing prerequisites
In Ubuntu, we'll connect to our wireless network, and open a Terminal window. Then we can install our prerequisites.
$ sudo apt-get install zsh sudo gnupg cryptsetup pinentry-curses exfat-fuse exfat-utils
Enabling tomb bury and tomb engrave
Tomb van embed your Tomb key inside an image using steganography, or print your Tomb key as a QR code. Tomb requires steghide and qrencode to enable these features. Because we booted into the Ubuntu live mode, only a restricted number of packages are available via apt. steghide and qrencode are not among those.
If you do not intend to embed your Tomb key inside an image using steganography, you can skip these steps.
We'll start by adding the Ubuntu Universe repository to our running system. And then we'll install the additional packages.
$ sudo add-apt-repository universe
$ sudo apt-get update
$ sudo apt-get install steghide qrencode
Download Tomb
We will download Tomb from its official servers and use gpg to verify the signatures of the downloaded file:
$ wget https://files.dyne.org/tomb/releases/Tomb-2.8.1.tar.gz
$ wget https://files.dyne.org/tomb/releases/Tomb-2.8.1.tar.gz.asc
$ gpg --keyserver pool.sks-keyservers.net --recv 4ACB7D10
$ gpg --verify Tomb-2.8.1.tar.gz.asc Tomb-2.8.1.tar.gz
If all is well you will see:
gpg: Good signature from "Denis Roio (Jaromil) <jaromil@dyne.org>
Now we have a verified download of Tomb and we can start with extracting Tomb.
$ tar zxf Tomb-2.8.1.tar.gz

Warning: From this point onwards, we'll be generating your secret keys and typing in your password. In order to minimize risks, you are advised to take your device offline at this point!
Creating a secure tomb
Insert the USB stick you marked with 'Tomb'. Ubuntu will mount the USB stick somewhere in /media/ubuntu/. In the rest of the article we'll reference it as <tomb_usb>.
Save Tomb archive
If you want to be sure that the version of Tomb that was used to make your secure file is still available when you want to extract it, you should copy the Tomb archive to your USB drive.
cp ~/Tomb-2.8.1.tar.gz* /media/ubuntu/<tomb_usb>
Create Tomb
Now we can start with creating the actual Tomb file. We'll call it secrets.tomb.
$ tomb dig -s 10 /media/ubuntu/<tomb_usb>/secrets.tomb
The -s 10 means a file of 10 Megabytes is created, which is the minimum size. You can scale this according to your needs of course.
Create keyfile with selected password
We don't want our secrets.tomb and keyfile to exist on the same filesystem, so we'll create our keyfile in the /tmp memory filesystem and copy it to our key USB drive later on.
$ Tomb-2.8.1/tomb forge /tmp/keyfile
Note: This may take a while!
Lock the tomb
After the keyfile has been created, we can lock the tomb with it.
$ Tomb-2.8.1/tomb lock /media/ubuntu/<tomb_usb>/secrets.tomb -k /tmp/keyfile
Open and fill tomb
Now we can open the tomb file and fill it with all our secret data
$ Tomb-2.8.1/tomb open /media/ubuntu/<tomb_usb>/secrets.tomb -k /tmp/keyfile
You can fill the tomb and close it when your done with:
$ Tomb-2.8.1/tomb close all
And finally we can have Ubuntu eject our USB drive and we can store it somewhere safe.
Create key USB
Before we close our Ubuntu system we should store our keyfile somewhere.
For that we insert the USB stick we marked with 'Keyfile'. Again Ubuntu will mount the USB stick somewhere in /media/ubuntu/. In the rest of the article we'll reference it as <key_usb>.
Copy the key to our USB drive
Then we copy our generated keyfile to our USB drive.
cp /tmp/keyfile /media/ubuntu/<key_usb>
If you want you can also create a QR code from the key, so you can store it on paper with:
$ Tomb-2.8.1/tomb engrave -k /media/ubuntu/<key_usb>/keyfile
This will create an engraved file called keyfile.qr.png which we'll have to move to our drive.
$ mv keyfile.qr.png /media/ubuntu/<key_usb>
Or you can choose to bury it inside an image that you provide on your USB drive:
$ Tomb-2.8.1/tomb bury -k /media/ubuntu/<key_usb>/keyfile /media/ubuntu/<key_usb>/target.jpg
Retrieving data from a tomb
In order to retrieve data from your tomb, we'll have to do everything the other way around.
Retrieve the key from an image
If you used an image to bury your key in, you can exhume the key as well:
$ Tomb-2.8.1/tomb exhume -k /media/ubuntu/<key_usb>/keyfile /media/ubuntu/<key_usb>/target.jpg
Shutdown
The only thing that now remains is to have Ubuntu eject our USB drive and to shut the whole Live environment down using:
$ sudo shutdown -h now
Conclusion
Because you used a Ubuntu live system, you can be reasonably sure that no traces of your secret tomb file or your keyfile are left anywhere except on the two marked USB drives. Make sure you store them separately and securely!